
Version 1.15
From Google Maps scraping to AI-powered enrichment - here’s how to use the platform step by step.
Last updated: Feb 2, 2026
Getting Started with Scrape Info
I'm Sophie, and I wanted to personally welcome you to Scrape Info!
In this quick guide, I'll show you just how easy it is to scrape google maps, websites and enrich leads with AI.


Sophie Stafford
Assistant @scrapeinfo
Create Your Account
Sign up in seconds — no card required. All new accounts receive free monthly credits so you can test the platform before upgrading.
Understand How Credits Work
Every action uses credits.
1 credit = 1 result returned
Examples:
Scrape 100 Google Maps businesses → 100 credits
Extract 250 website contacts → 250 credits
Enrich 500 leads → 500 credits
Credits reset monthly on subscription plans.
You can also buy one-time top-up credits anytime.
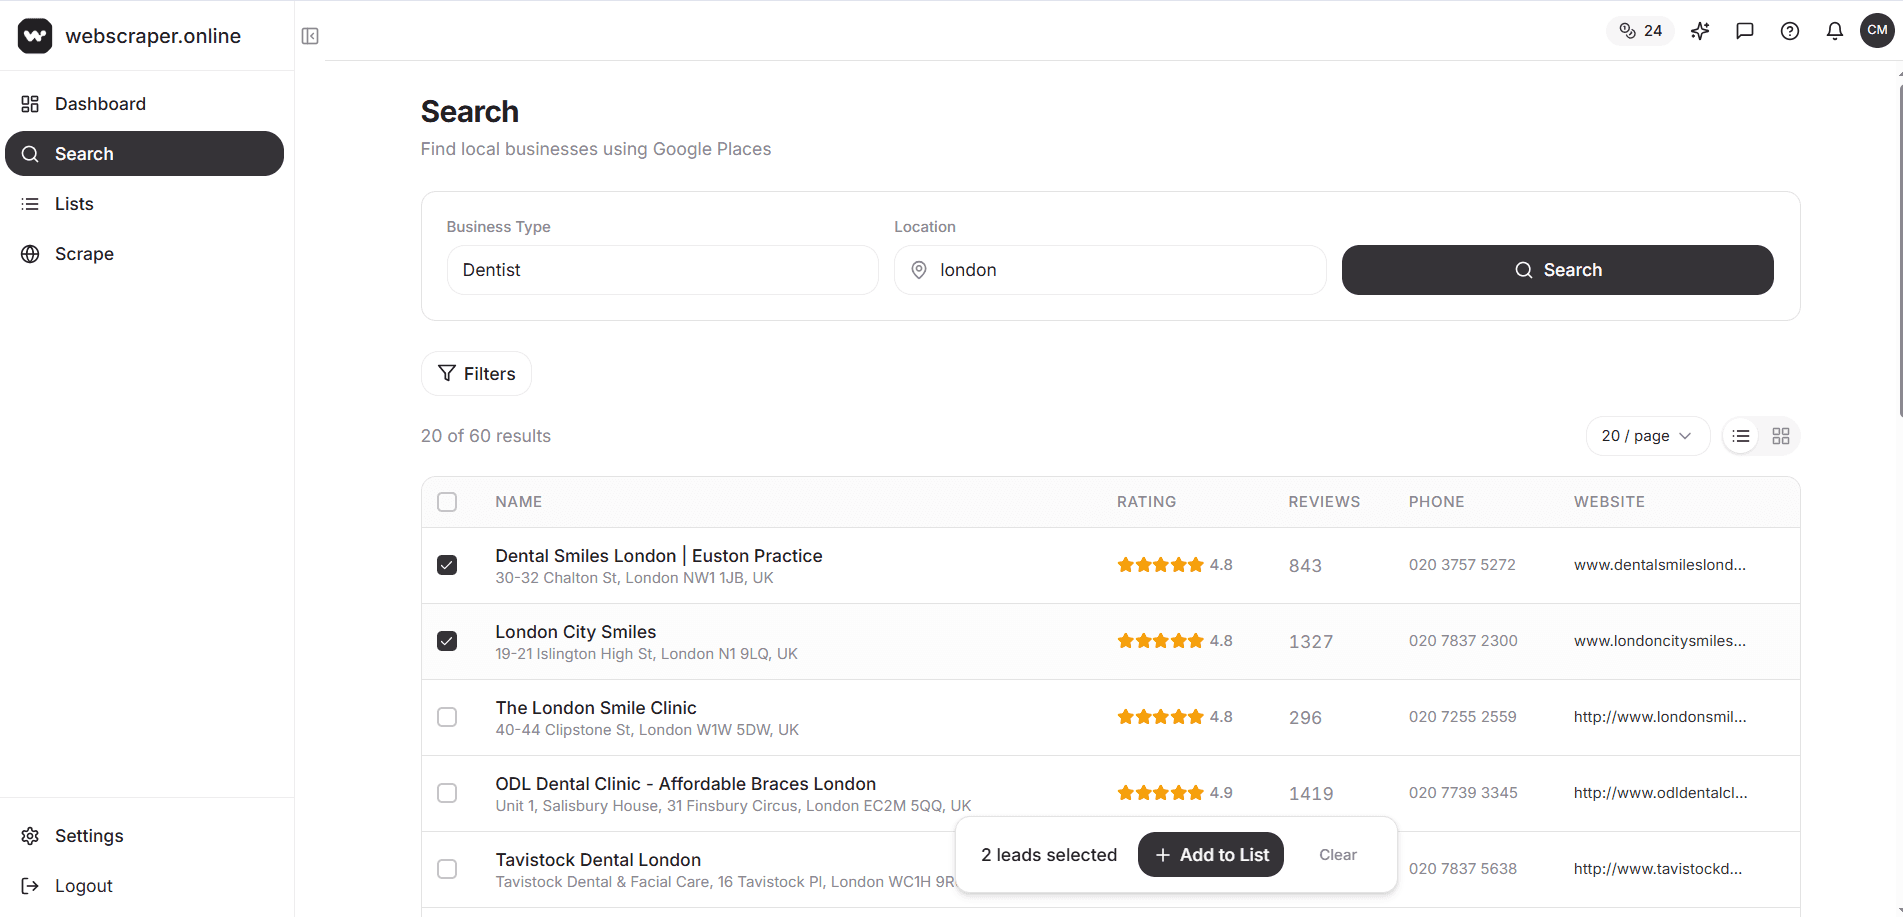
How to Scrape Google Maps
Best for:
Local lead generation
Agency prospecting
Finding niche businesses
Step-by-step:
Enter a keyword (e.g. “dentist”)
Enter a location (e.g. “London”)
Select Options
Select What Data To Import
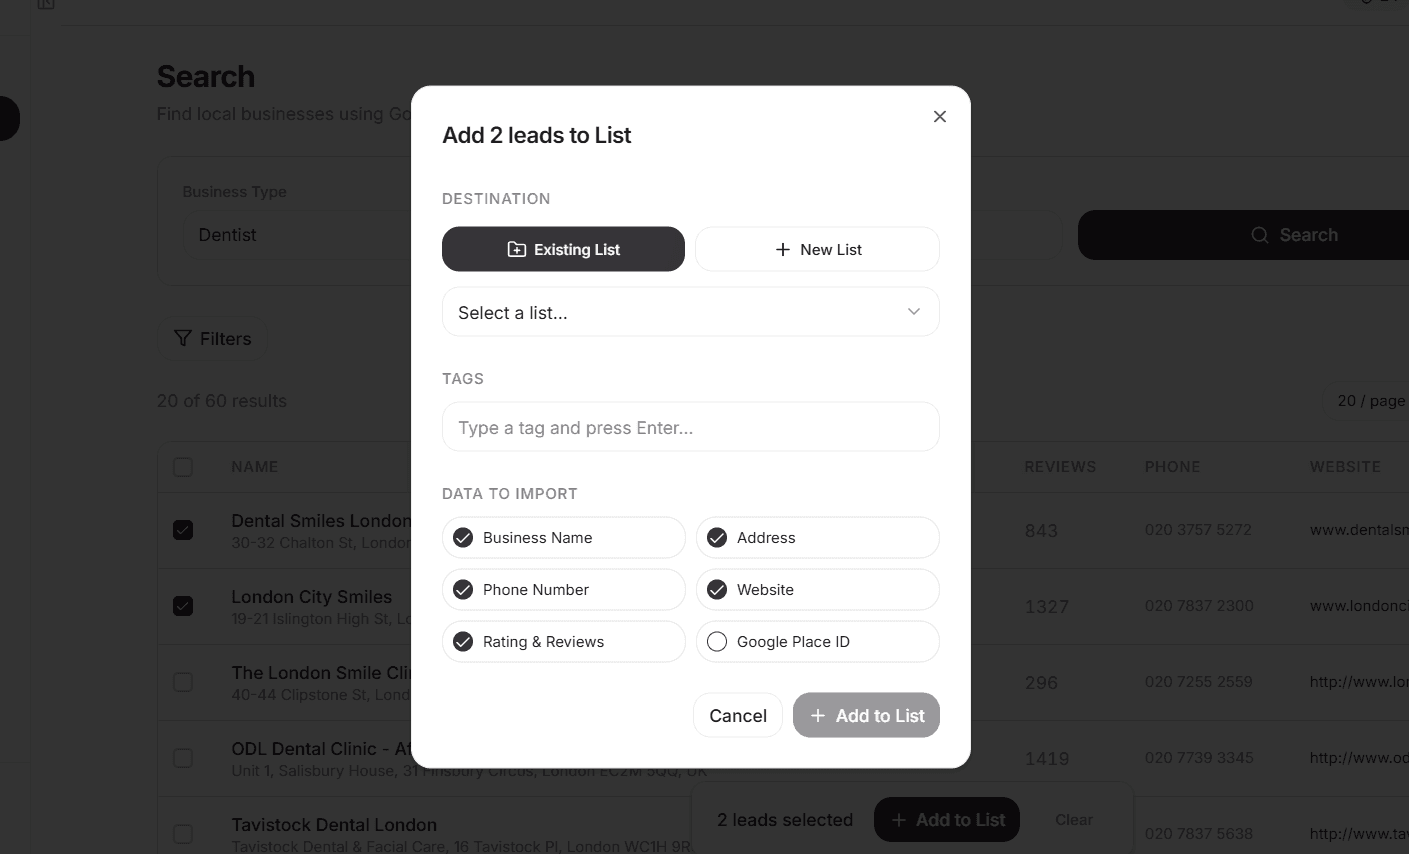
Add To List/Create New
You’ll get:
Business name
Website
Phone
Address
Rating
Reviews count
Or select custom
Google Maps Scraper
Working With Lists
Lists are where all your leads live.
You can:
Store scraped Google Maps data
Import your own contacts
Filter and segment
Enrich selected businesses
Export exactly what you need
Everything starts with a list.
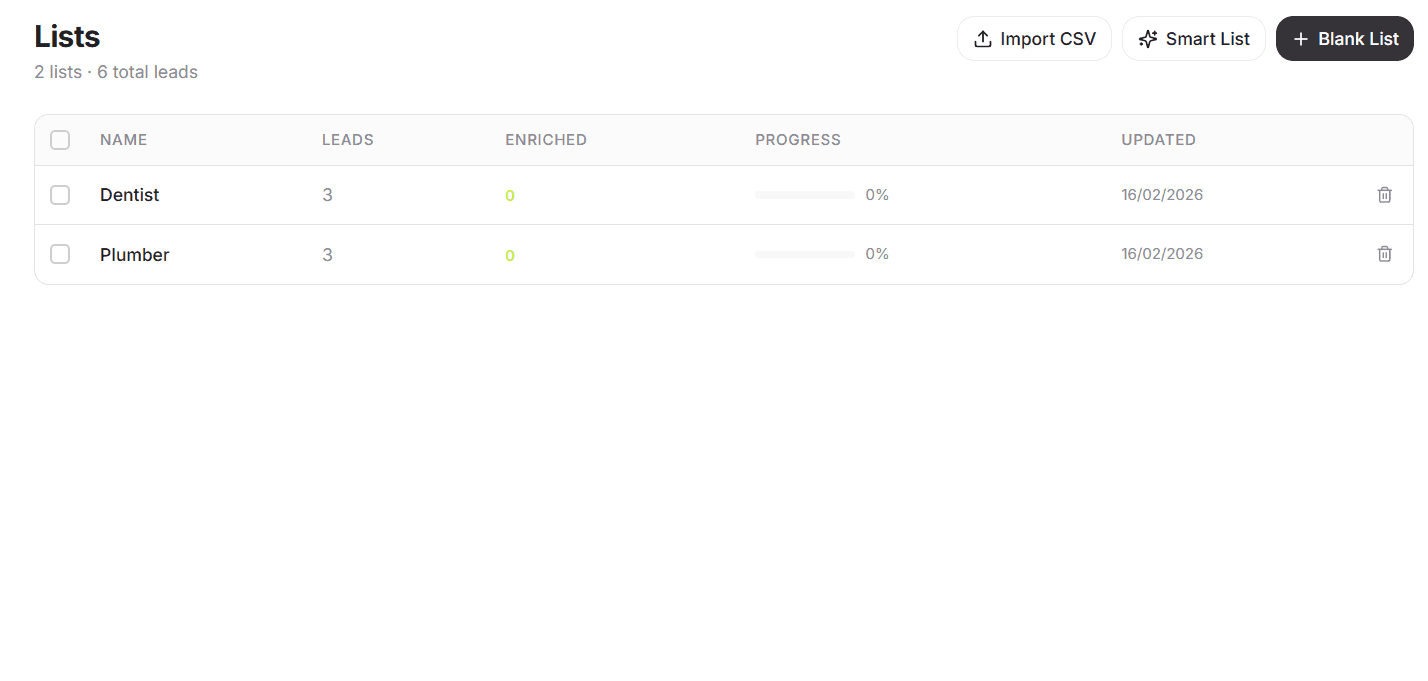
The Lists Overview Page
From the Lists page, you can:
Import CSV
Upload your own leads (domains, businesses, or contacts).
Create Blank List
Start with an empty list and manually add or move leads into it.
Create Smart List
Automatically build dynamic lists using filters.
Importing Your Own Lists
You can upload a CSV file containing:
Business names
Domains
Emails
Phone numbers
Any structured lead data
After upload, your leads will appear in a new list.
From there, you can:
Filter them
Enrich them
Export them
Creating a Smart List
Smart Lists allow you to automatically segment leads based on conditions.
You can filter using:
Basic Filters
Google Maps data such as:
Rating
Number of reviews
Contact availability
Location
Enrichment Filters
Data added after enrichment such as:
Lead score
Services detected
Sentiment
Custom extracted fields
Example Smart Lists:
“High-rated but low-review dentists”
“Businesses without emails”
“Leads with 4.5+ rating and website”
Smart Lists update dynamically as data changes.
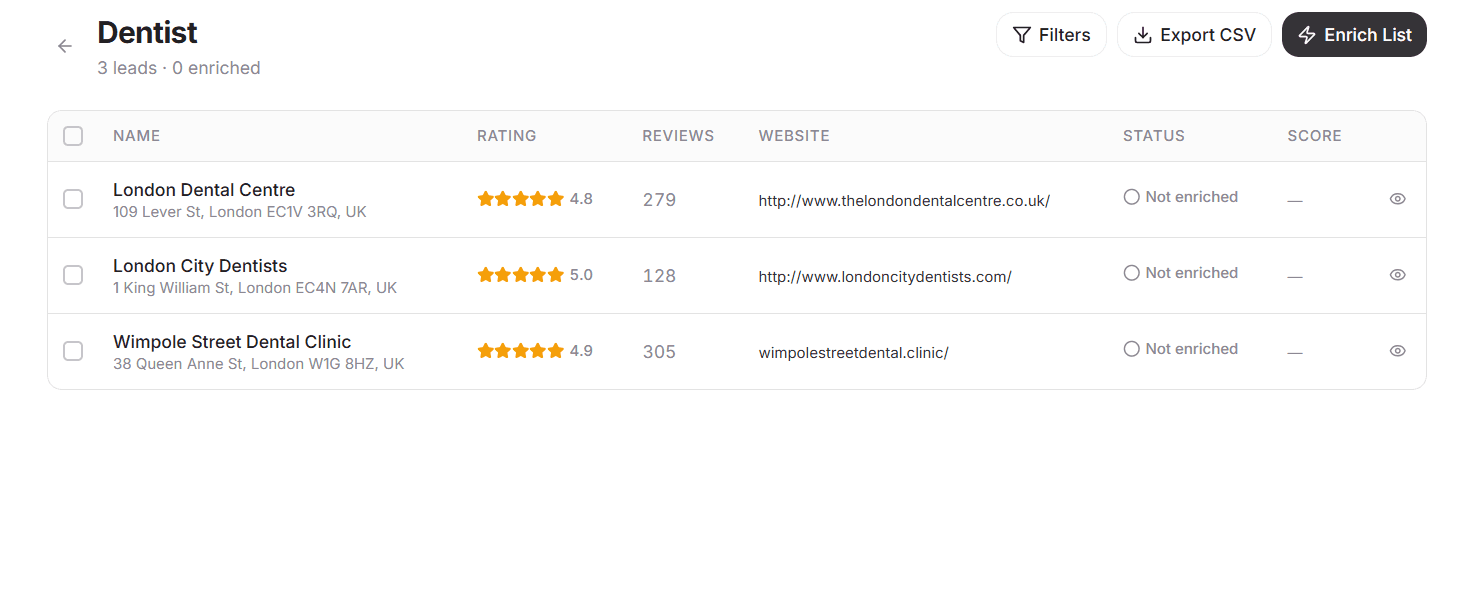
Inside a List
When you click into a list, you’ll see:
Business name
Address
Rating
Review count
Website
Enrichment status
Score (if enriched)
From here you can:
✔ Select individual contacts
✔ Filter results
✔ Export CSV
✔ Enrich entire list
✔ Enrich selected contacts
Enriching a List
Enrichment analyzes a business’s website and extracts additional data.
You can:
Enrich the entire list
Enrich selected contacts only
Enrichment profiles let you control what data is extracted.
You can:
Use a default profile
Create custom extraction profiles in Settings
(We’ll cover custom profiles in a separate guide.)
After enrichment, additional fields become available for filtering and exporting.
Exporting Data
You can export:
Raw Google Maps data
Enriched website data
Custom selected columns
You control exactly what gets exported.
Choose:
All contacts
Selected contacts
Custom columns
Exports are delivered as CSV files, ready for:
CRMs
Outreach tools
Spreadsheets
Internal analysis
Typical Workflow
Scrape Google Maps
Store results in a list
Filter high-value businesses
Enrich selected contacts
Export custom columns
Start outreach
Scrape & Web Analysis
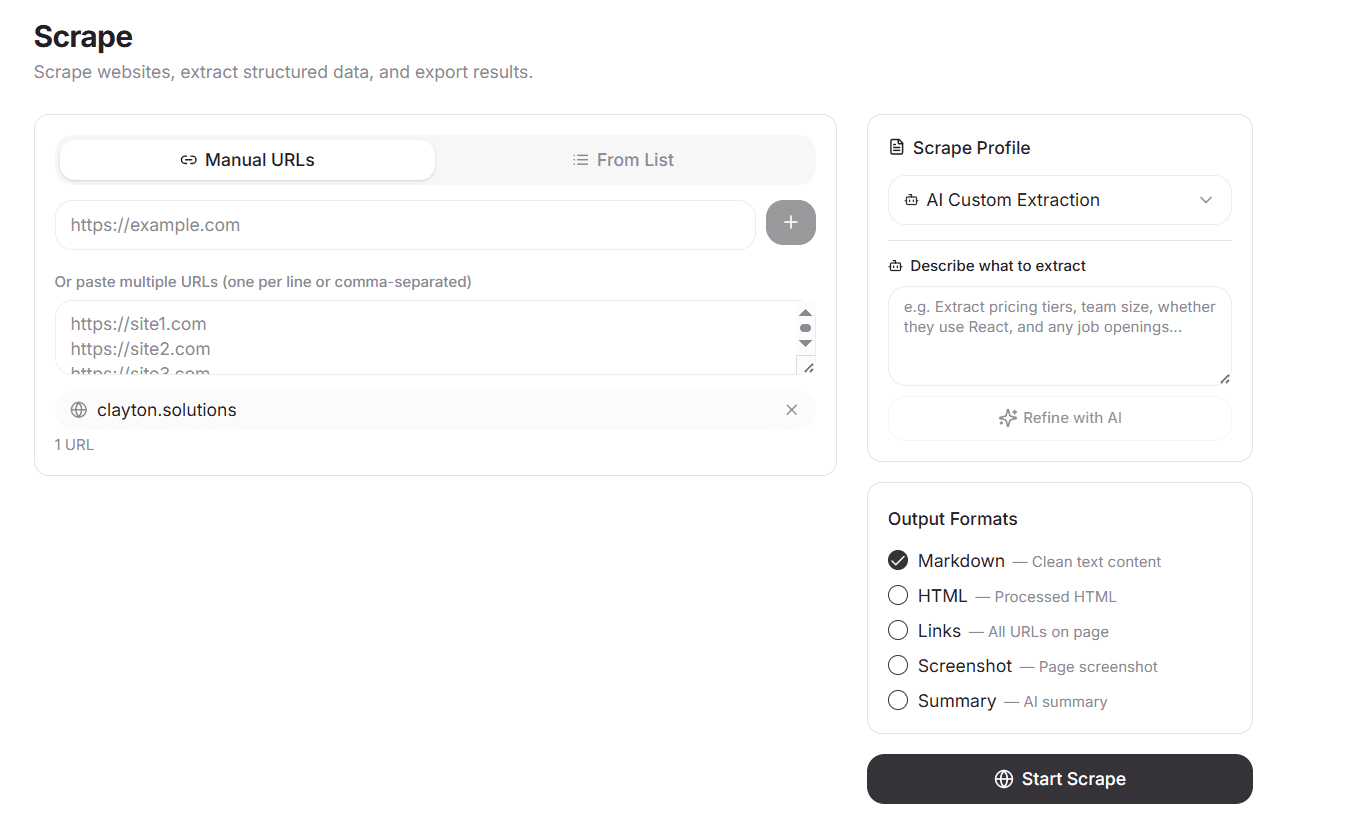
The Scrape page allows you to extract structured data from websites.
You can:
Scrape individual URLs
Add multiple URLs at once
Run web analysis on an existing list
Use predefined scrape profiles
Use AI to define custom extraction rules
Scraper
Scraping Individual URLs
You can paste:
A single website URL
Multiple URLs (one per line)
Then select a scrape profile and start extraction.
Best for:
Quick prospect research
One-off website analysis
Testing extraction profiles
Scraping an Existing List
Instead of pasting URLs, you can:
Select an existing lead list
Run web analysis on all contacts (or selected ones)
This is ideal when you’ve:
Scraped Google Maps
Imported a CSV
Created a Smart List
You can enrich and scrape in bulk.
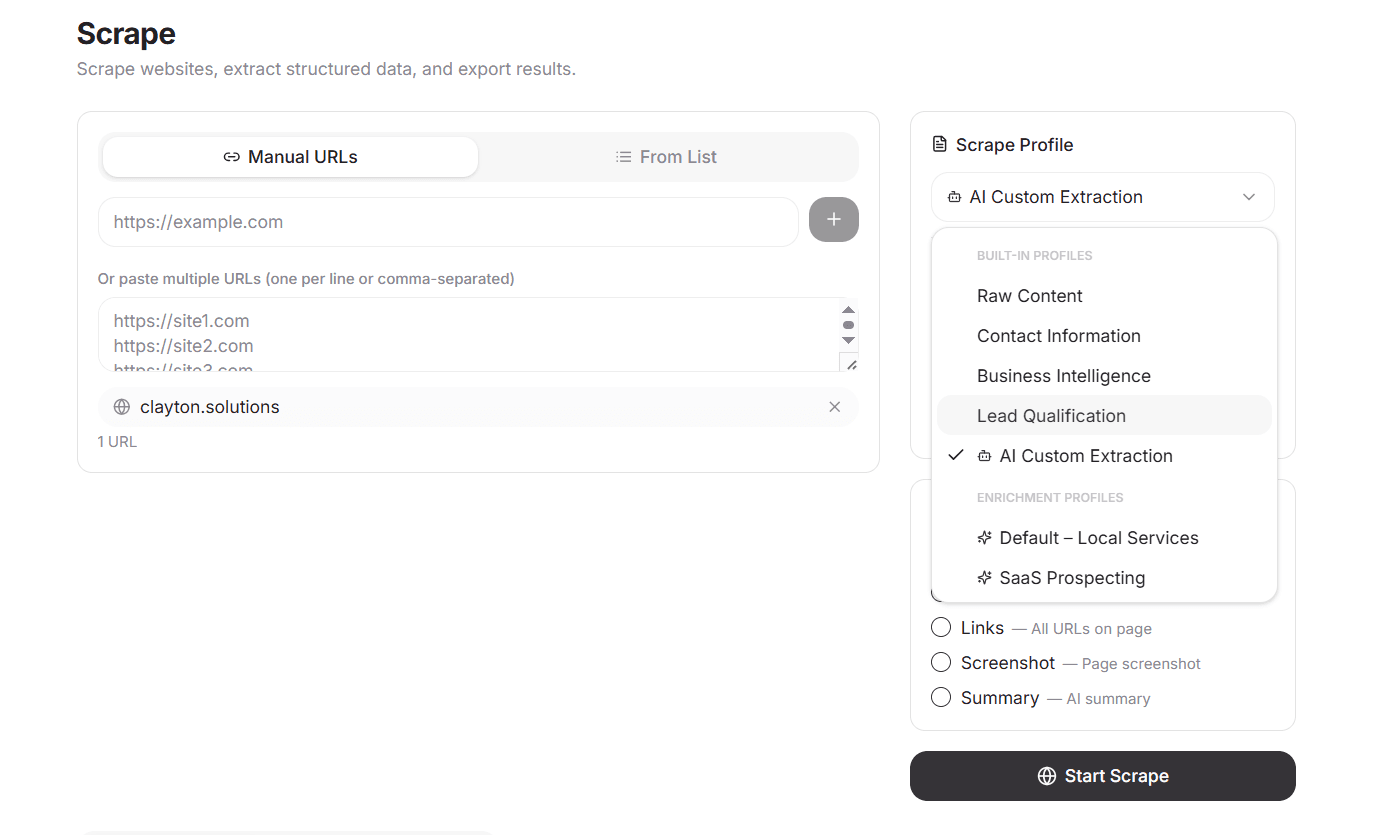
Scrape Profiles
Scrape Profiles define what data gets extracted.
You can choose:
Contact Information
Emails
Phone numbers
Social links
Contact pages
Business Intelligence
Services offered
About/company info
Location data
Technology signals
Lead Qualification
ICP matching
Industry detection
Service keywords
Custom scoring fields
These profiles can be:
Default system profiles
Custom profiles created in Settings
(We’ll cover profile setup in the Settings guide.)
AI Extraction Mode
Instead of selecting a preset profile, you can use AI.
Simply describe what you want to extract.
Example:
“Find decision maker names and job titles”
“Extract pricing information”
“Identify services related to cosmetic dentistry”
The AI will analyze the website and return structured results.
Best for:
Niche targeting
Complex extraction
Custom research
⚙ Running the Scrape
Once configured:
Select profile (or AI mode)
Confirm URL source (manual or list)
Start analysis
Each website processed uses credits.
You’ll see:
Processing status
Completion updates
Extracted fields
Exporting Results
After scraping, you can:
Download results directly as CSV
Send data to a lead list
Combine with existing enrichment data
When exporting, you can:
Select specific columns
Include only scraped data
Include Google Maps + enrichment + scrape data
You control exactly what gets exported.
Typical Scrape Workflow
Quick Research
Paste URL → Select profile → Download CSV
Lead Qualification
Scrape Google Maps → Filter → Scrape selected websites → Export enriched + scrape data
AI Targeting
Import list → Use AI extraction → Create Smart List based on results → Export high-fit leads
Settings & Account
The Settings page is where you configure how data is extracted, manage your subscription, and monitor usage.
This is also where you create and manage Enrichment & Scrape Profiles.
Settings & Account
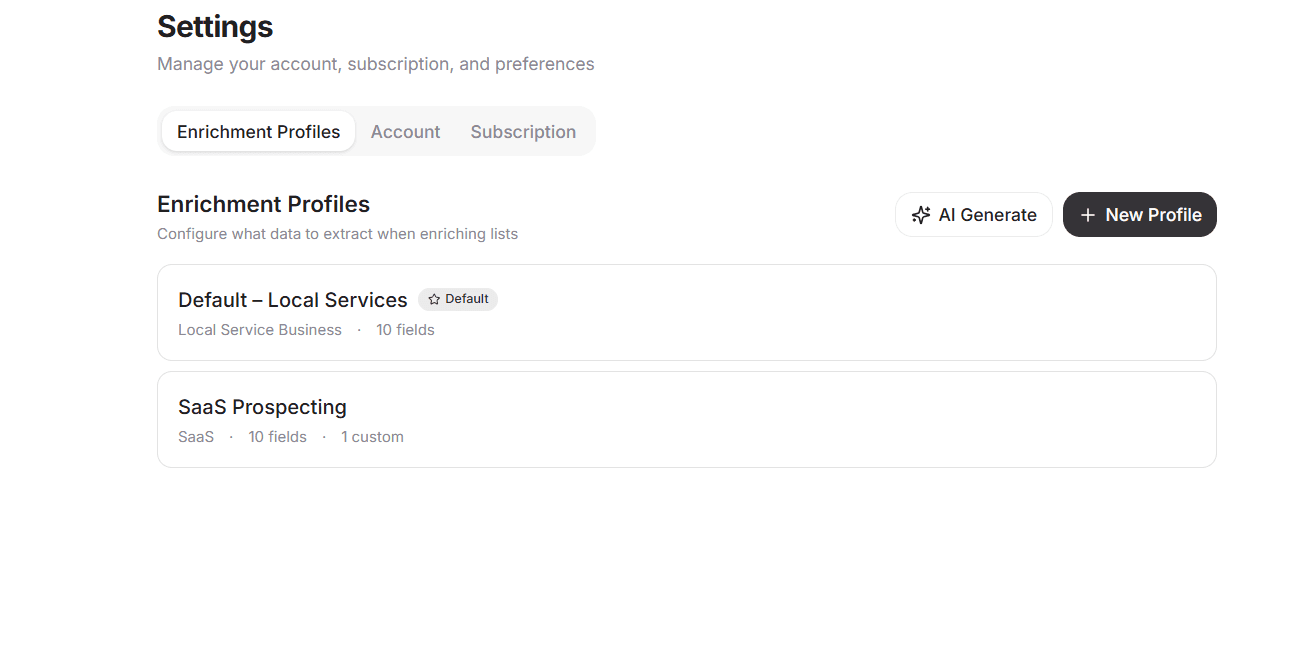

Enrichment & Scrape Profiles
Profiles define what data your system extracts from websites.
The same profiles can be used to:
Enrich lead lists
Run web analysis in the Scraper
Automate structured data extraction
Create once. Use everywhere.
Creating a Profile
To create a profile:
Click Create Profile
Name your profile
Choose extraction method:
Template
Custom fields
AI description
Using Templates
Templates are pre-built extraction setups such as:
Contact Information
Business Intelligence
Lead Qualification
Local SEO Signals
Templates are ideal for:
Quick setup
Common use cases
Standard outreach workflows
Custom Fields
You can define exactly what you want to extract.
For each field, specify:
Field name
Data type
Instructions for AI
Example fields:
“Primary service offered”
“Mentions cosmetic dentistry (Yes/No)”
“Pricing page URL”
“Founder name”
This gives you full control over structured output.
AI Profile Builder
You can also describe your goal in plain English.
Example:
“Extract whether this business offers emergency services.”
“Identify high-ticket services mentioned.”
“Find decision makers and their roles.”
The system will generate a structured extraction profile automatically.
You can then edit and refine it before saving.
Using Profiles
Once created, profiles can be:
Applied when enriching lists
Selected inside the Scraper page
Used for bulk website analysis
Profiles ensure consistent, repeatable data extraction.
Account & Billing
Inside Settings → Account, you can:
Upgrade your subscription
Manage billing
Purchase top-up credits
View invoices
Usage & Credits
You can monitor:
Credits used this month
Remaining credits
Credit usage history
Each website processed or result returned consumes credits.
Top-up credits do not expire.
Subscription credits reset monthly.
Top Help Bar
At the top of the app, you’ll see:
Live Credit Counter
Displays your remaining credits in real time.
You can click it to:
View usage
Buy more credits
Upgrade your plan
AI Assistant
Need help?
Click the AI Assistant button to open the help sidebar.
You can:
Ask how features work
Get guidance on filters
Get help building extraction profiles
Troubleshoot issues
The assistant is context-aware and designed to guide you through the platform.
Typical Power Workflow
Create a custom extraction profile
Scrape or enrich a list
Filter using enriched fields
Export structured lead data
Repeat with refined targeting